Glasses are small, but they are not flat. Folded frames have length, width and thickness; hinges and curved temples add shape in places a simple ruler across the lenses will miss. A useful knitted case begins by measuring that three-dimensional bundle, then translating it into a piece of fabric that can open, close and sit quietly around it.
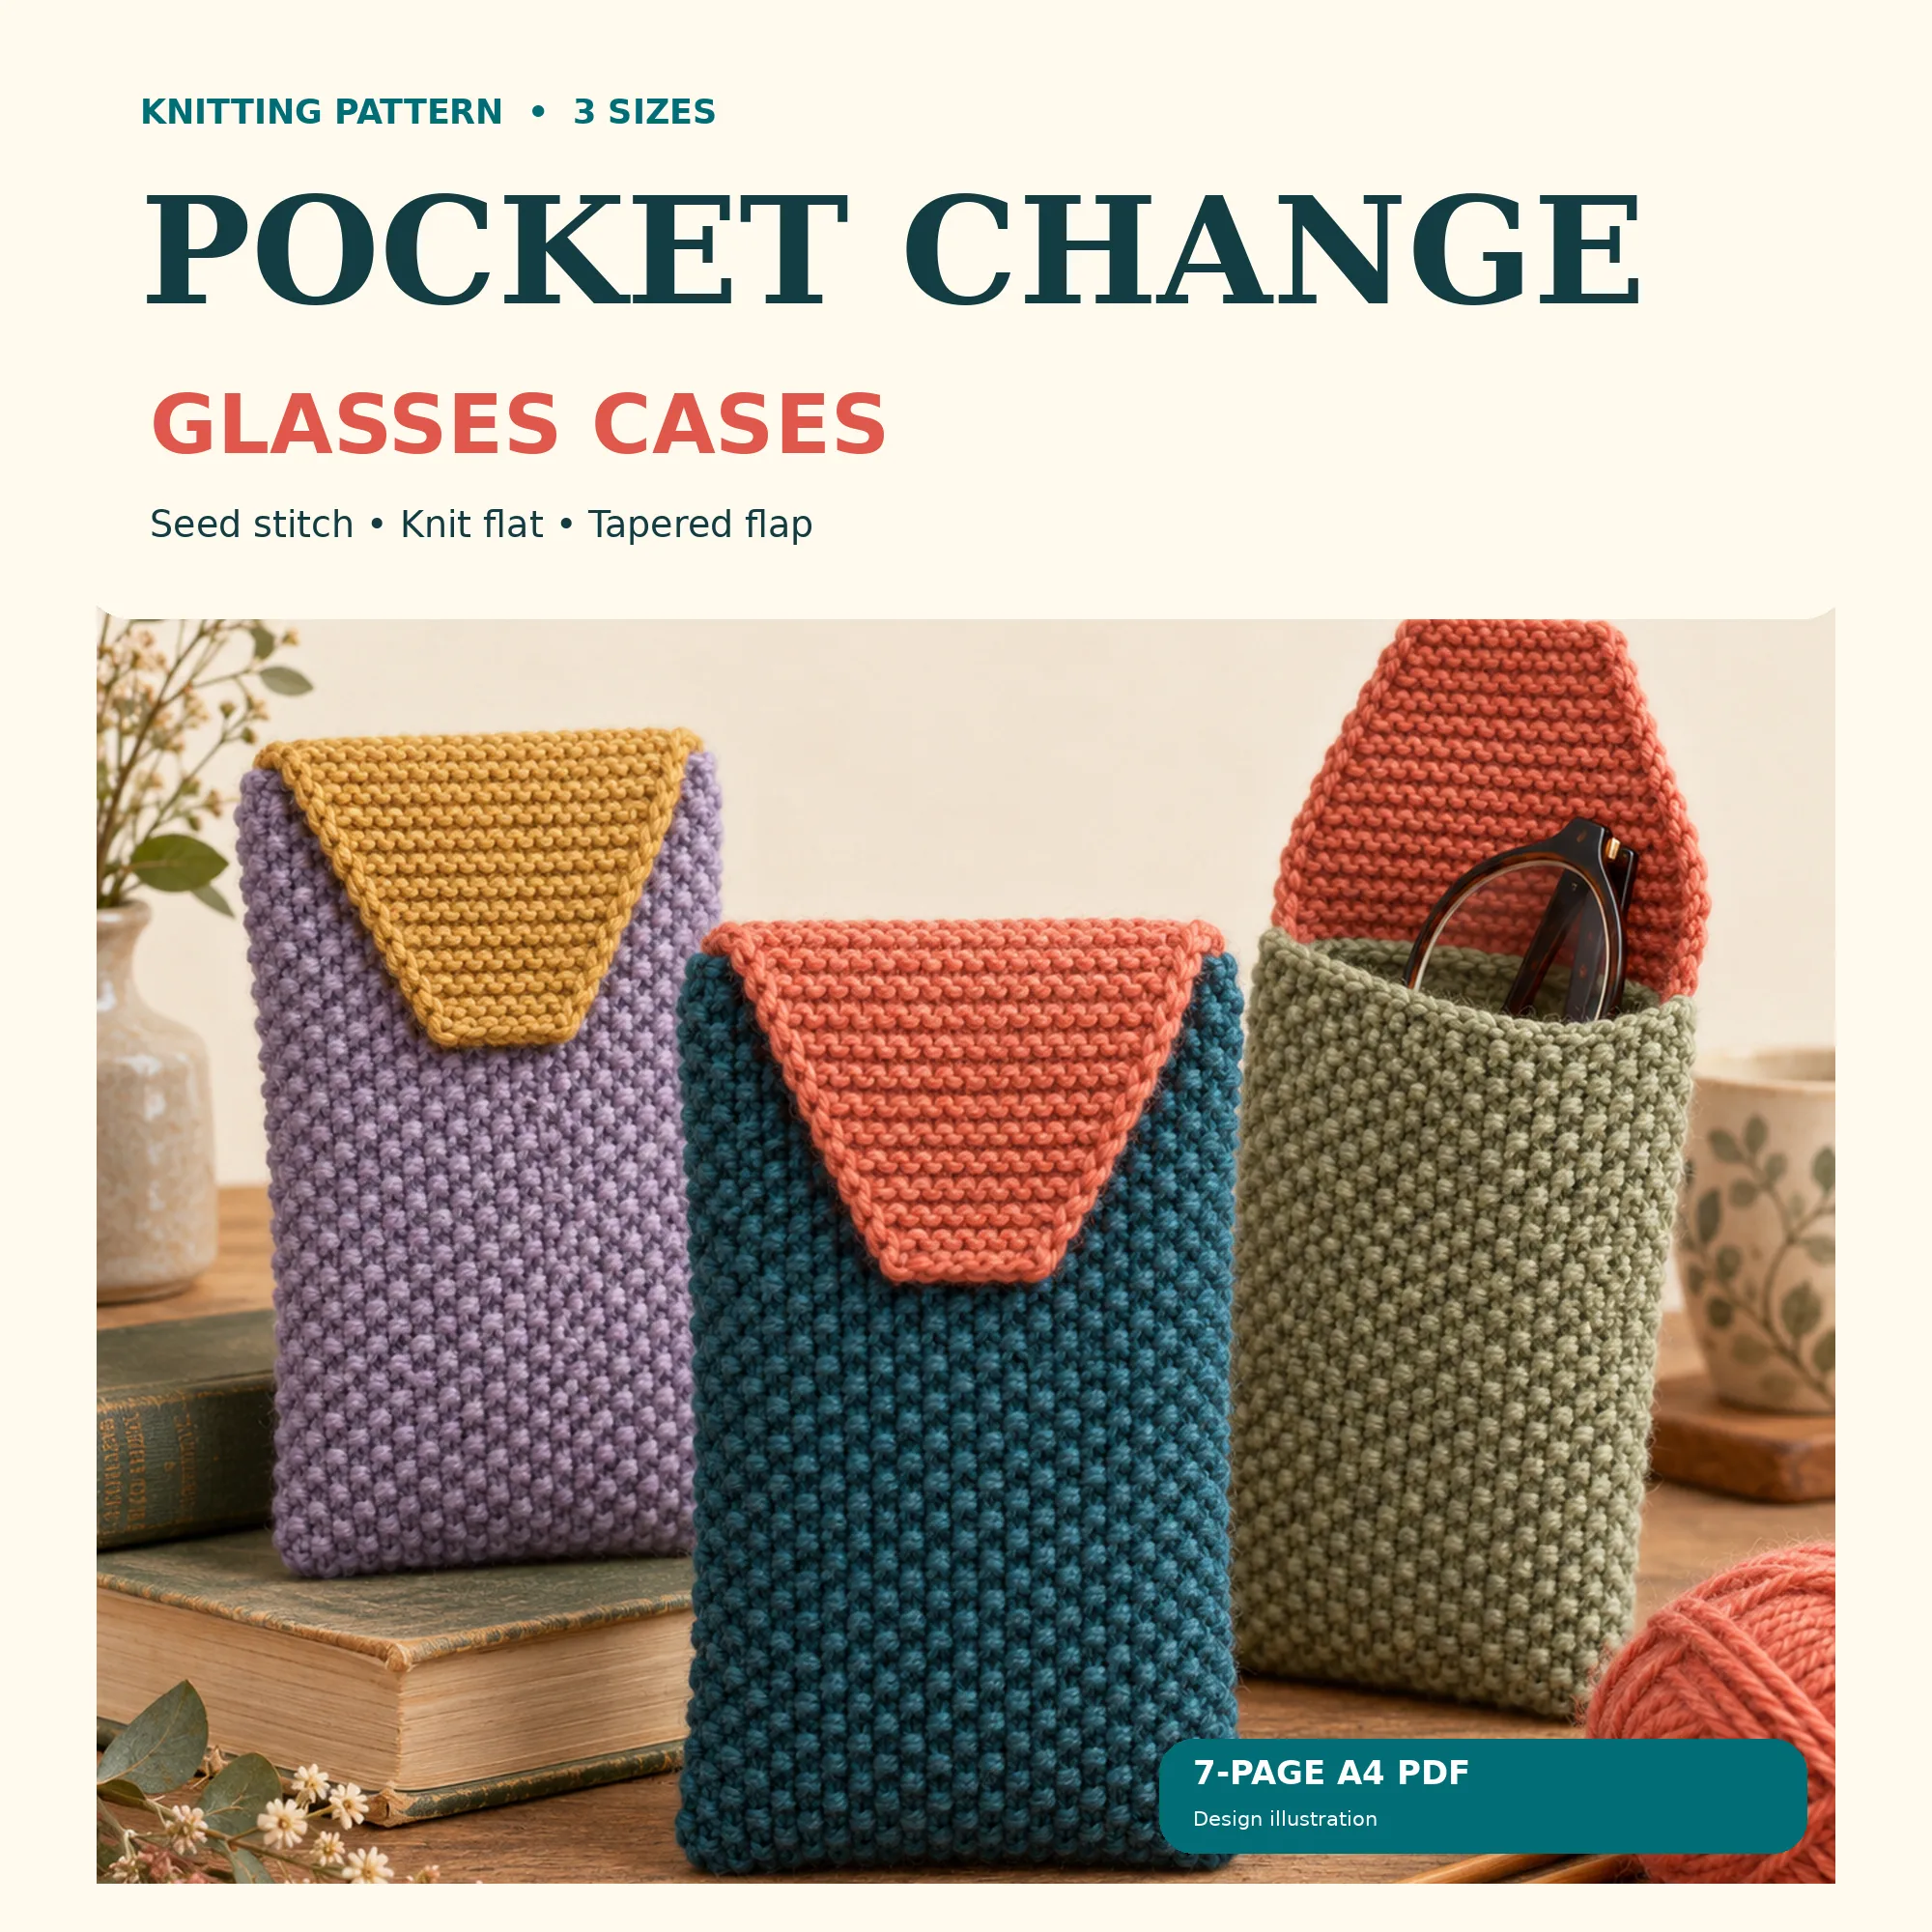
Pocket Change is a seven-page A4 pattern for Slim, Standard and Roomy cases, plus a worked custom-fit route. Each case is knitted flat in DK yarn with a two-row seed-stitch body and tapered garter-stitch flap, then folded and joined with two side seams. There is no button or hard fastening near the frames. Use the pattern for its exact stitch counts, row counts, fold markers, paired decreases and lining instructions; this guide explains how to make the choices around them.
Measure the glasses while they are folded
Place the folded glasses on a clean cloth. Measure from the widest outer edge to the opposite edge for length, across the thickest part for width and from the lowest to the highest point for thickness. Keep the tape or ruler straight rather than following every curve. If the temples cross unevenly, take the larger measurement; the case must fit the glasses you actually own, not their tidiest possible pose.
Repeat each measurement once. Check the hinge area, bridge and temple tips for any point that projects beyond the first reading. Write the three figures beside the pattern before comparing them with Slim, Standard and Roomy. The names are convenient labels, not universal eyewear standards: a narrow pair of sunglasses may be longer than everyday spectacles, while chunky frames can be compact and surprisingly deep.
Pocket Change's custom-fit calculation uses all three folded-frame measurements and includes a worked example. Follow that calculation when the standard finished sizes do not provide sensible room. Do not simply add a few stitches to the width and hope the length will organise itself; the bottom fold, body depth and flap shaping need to agree.
Choose useful ease, not a tight grip
A soft case needs a little clearance so the frames slide in without catching, yet excessive room lets them move about. Compare the pattern's finished measurements with the folded glasses and the intended lining. The fabric should not need to stretch around the hinges or bow away from the side seams. If insertion requires pressure on the lenses, bridge or arms, the case is too small for that pair.
Make a quick paper envelope at the planned finished width and length if the choice is close. It will not imitate knitted stretch or thickness, but it can reveal an obviously short flap or an opening that barely accepts the folded frames. Include the planned lining in the final fit decision: even a thin layer occupies space inside a small case.
Check both washed gauges
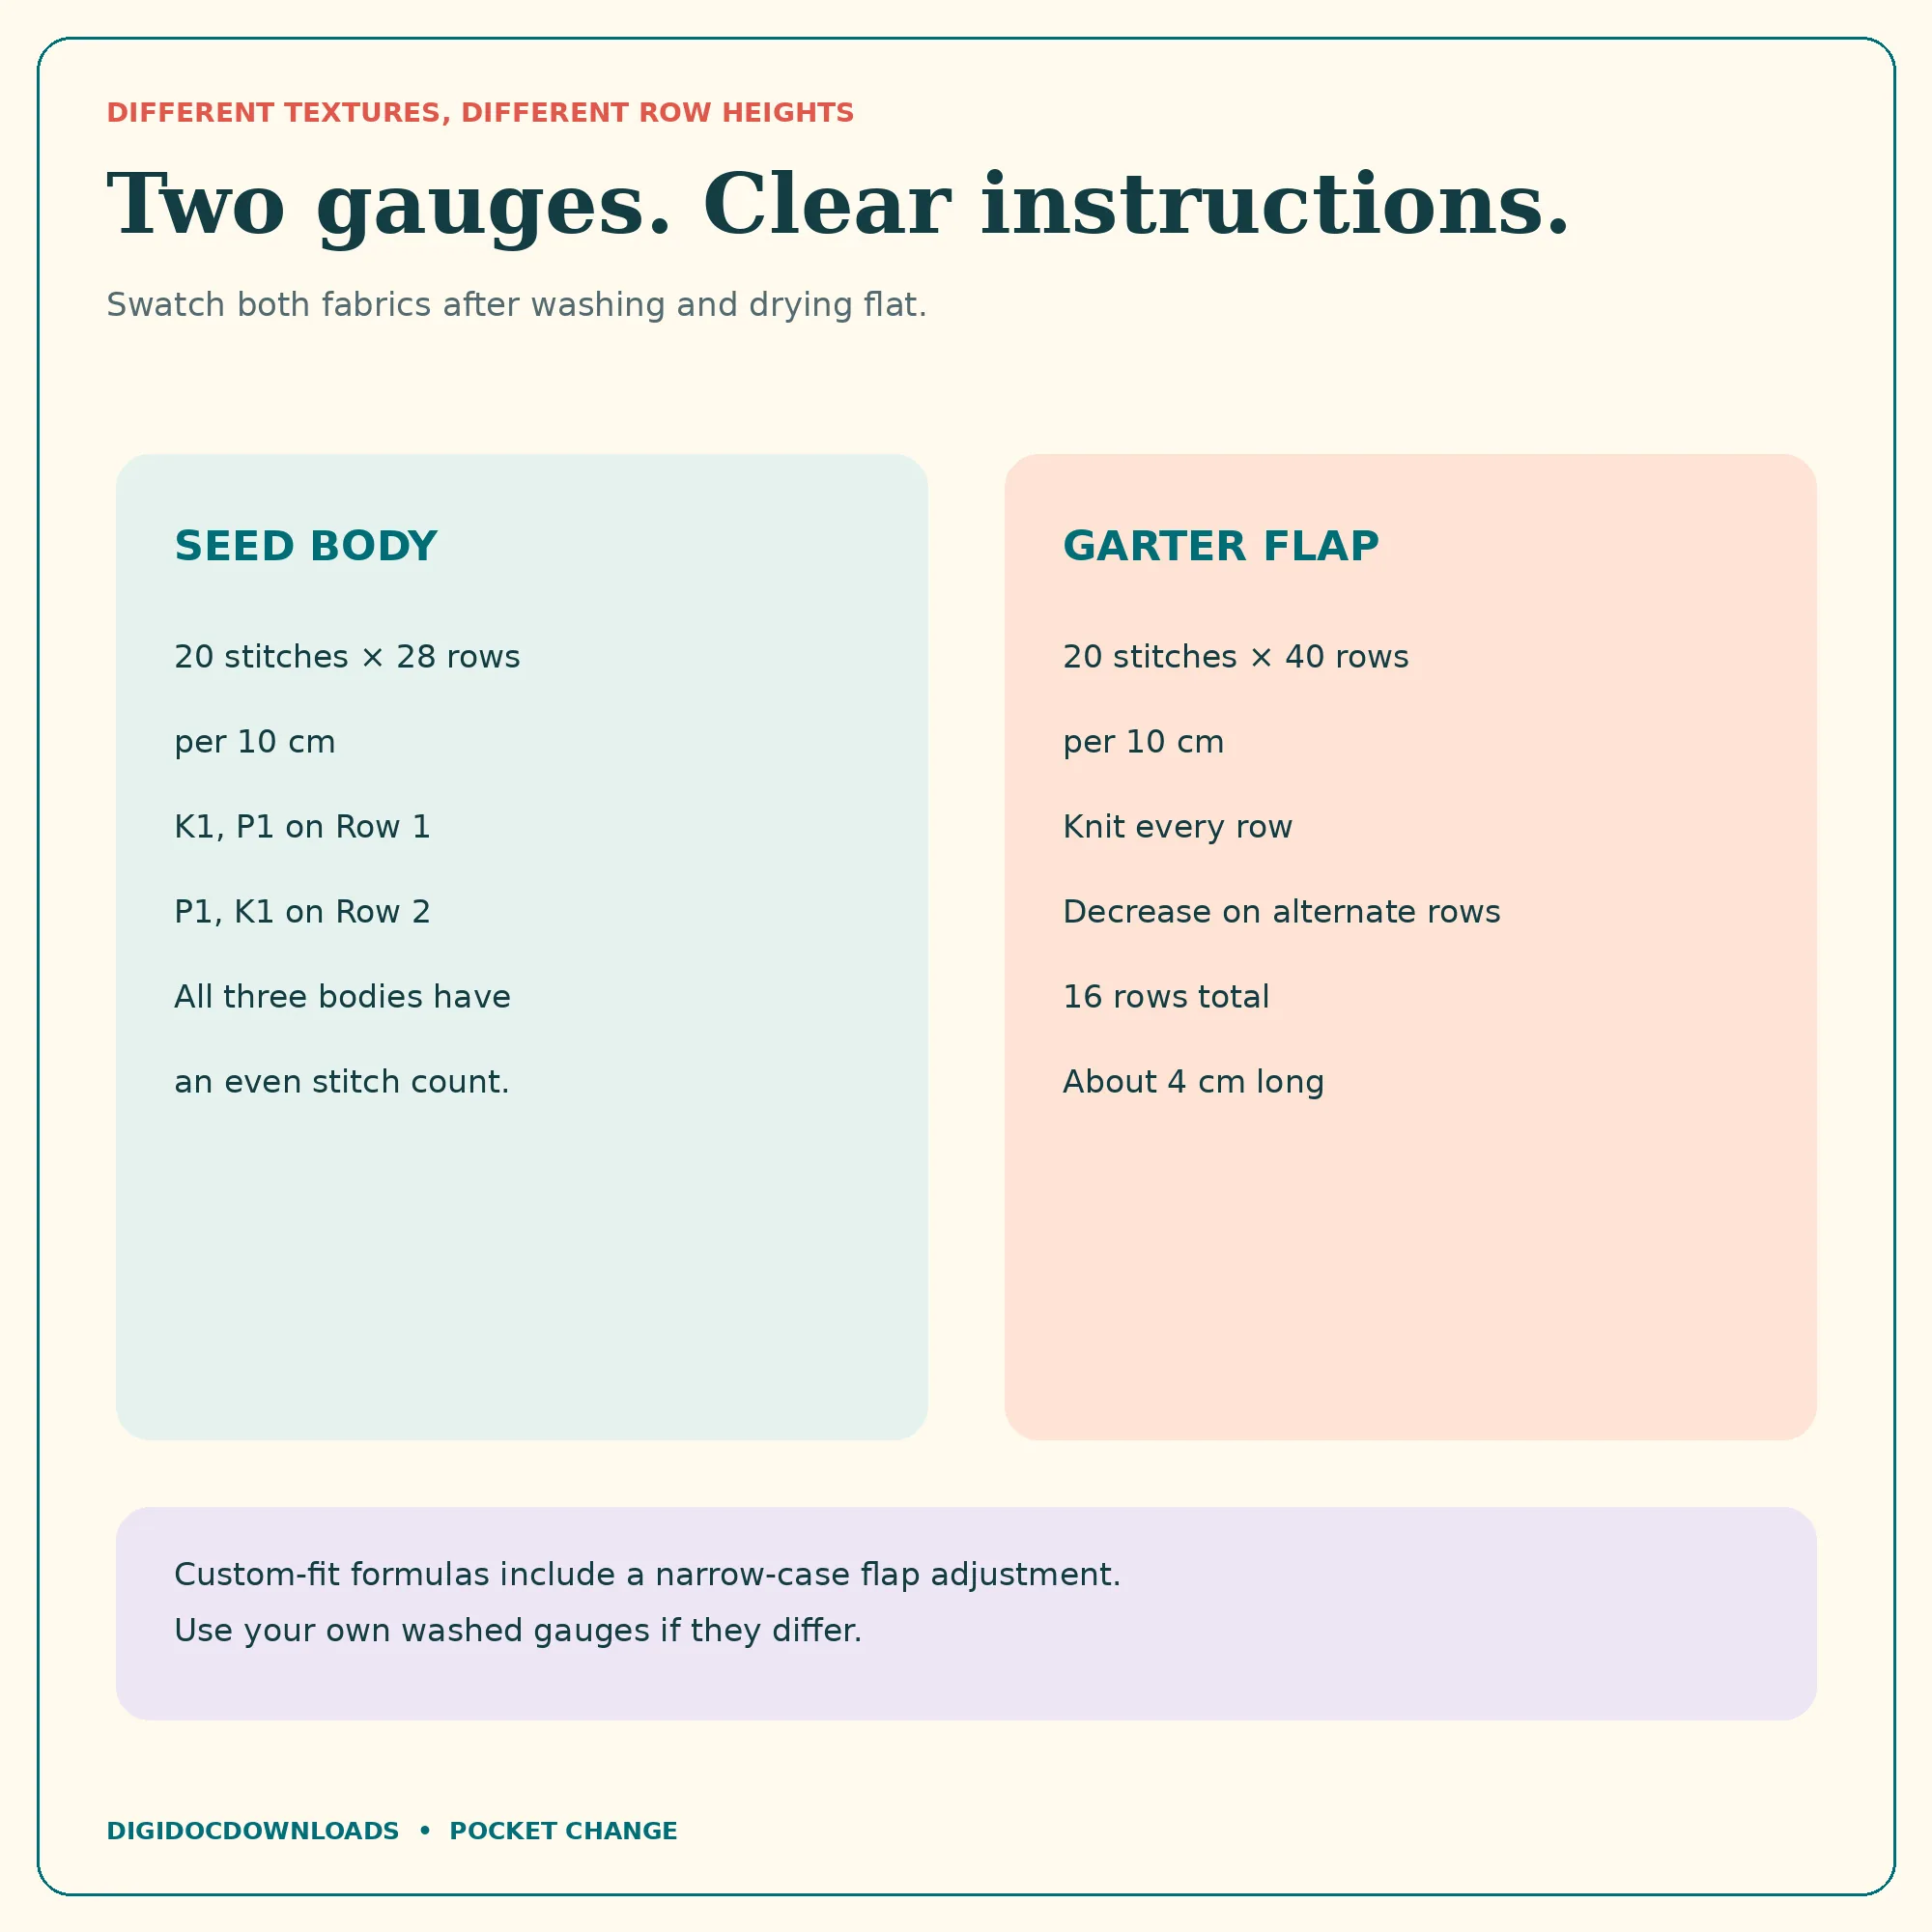
The seed-stitch body and garter-stitch flap make different fabrics. Pocket Change therefore gives separate washed gauges: the body is checked in its two-row seed repeat, while the flap is checked in garter stitch. One stocking-stitch swatch cannot prove either measurement, and a seed-stitch square cannot reliably predict the height of a garter flap.
Use the intended yarn and starting needle, make each sample larger than the measuring area, then wash and dry it as the pattern and yarn label direct. The Craft Yarn Council's gauge guidance recommends sampling with the named yarn, needles and stitch pattern. The Knitting & Crochet Guild's tension-square guide shows why counting in a marked central area is more dependable than relying on edge stitches.
Pocket Change records 20 stitches and 28 rows per 10 cm for the washed seed-stitch body, and 20 stitches and 40 rows per 10 cm for the washed garter flap. If your numbers differ, use the pattern's own washed gauges and adjustment guidance. Change the needle size and swatch again rather than stretching a sample towards the ruler. The row difference is not a clerical curiosity; it is the reason the two textures need separate planning.
Choose yarn that keeps the stitches legible
A smooth DK yarn makes the alternating knit-and-purl texture easy to read and the decrease rows easier to count. Keep the ball band with the project. The Craft Yarn Council's yarn-label guide lists fibre, weight, gauge and care information among the details worth retaining. Two yarns can share a weight label and still produce fabrics with different density, recovery and surface feel.
Avoid a yarn so fuzzy that loose fibres collect around hinges or obscure the seed pattern. A first case in one colour is a complete design and makes shaping easier to follow. If using more than one colour, swatch them together and check that they behave similarly after washing. An elegant stripe loses some authority when one yarn relaxes and the other remains ready for parade.
Keep the seed-stitch rhythm visible
The body alternates knit one, purl one on the first row and purl one, knit one on the second. All three standard bodies use an even stitch count. Place a small removable marker on the right side and keep a two-row tally beside the work. If the columns begin stacking into rib, stop and inspect the previous row: seed stitch forms its texture by working the opposite stitch above the one below.
Count body rows as well as measuring length. Place the bottom and flap-fold markers exactly where the pattern directs; those markers turn one flat piece into a case with a planned front, back and closure. Check the relaxed width after several centimetres. A gradual tension change is easier to correct early than after the final side seam explains it in three dimensions.
Shape the flap symmetrically
The flap changes to garter stitch and tapers with paired decreases on alternate rows. Follow the stated stitch count after every shaping row. Counting only the decrease rows invites a small mistake to travel neatly towards the tip; the pattern's intermediate totals are there to catch it while there are still enough stitches to inspect.
Lay the work flat after each pair of decreases and compare both edges. The taper should narrow evenly, with no sudden step on one side. Pocket Change also includes a flap adjustment for narrow custom cases. Use that route when the custom body width calls for it rather than forcing the standard shaping onto a different stitch count.
Test the folds before sewing
Block or finish the piece only as directed, then place it wrong-side up and fold at the marked lines. The front and back edges should meet without pulling, and the flap should cross the opening comfortably. Slip the folded glasses into the unsewn shape while supporting them with both hands. This is a temporary fit check, not an invitation to test how far raw edges can stretch.
If the case is short, narrow or excessively loose, compare the finished knitting with the pattern measurements and your washed swatches before altering anything. Confirm the chosen size, cast-on count, body rows and fold positions. A seam can refine an edge; it cannot supply missing length or quietly remove several centimetres of unwanted width.
Decide whether the optional lining helps
The pattern includes an optional soft lining. A lining can give the inside a smoother surface and keep yarn ends away from hinges, but it must fit without bunching or tightening the case. Pre-wash fabric when appropriate for its care instructions, press it flat and follow the pattern's cutting and attachment guidance. Keep seam allowances tidy and all hard pinning tools out of the finished case.
Choose clean, soft fabric with no abrasive embellishment, loose glitter, metal print or bulky seam near the lenses. Inspect it in bright light and run a clean fingertip over the surface. A lining that feels rough, sheds fibres or contains a firm ridge is not improved merely by being hidden. If the knitted fabric is already smooth and the fit is close, an unlined version may be the better first test.
Sew two side seams without creating hard ridges
Fold the body at the marked bottom line and align the side edges row by row. Sew the two sides with even tension, following the pattern's assembly method. Pause every few centimetres to check that the seam lies flat and the opening remains symmetrical. Pulling the sewing yarn firmly can shorten the edge and create a ridge exactly where the frames need room.
Secure and bury yarn ends away from the interior contact area. Turn the case carefully, smooth the corners with fingers rather than a sharp tool and inspect both seams. Insert the glasses by holding the bridge or arms as their manufacturer recommends, not by pressing the lenses. The flap should close without stretching across the frame.
Use a soft sleeve for the job it can do
A knitted sleeve can keep folded glasses together and reduce light everyday contact inside a clean bag or drawer. It is not a rigid shell. ZEISS advises storing unworn glasses in a hard case and using suitable lens-cleaning materials. Use a hard case when the glasses may be crushed, dropped, sat on or carried beside keys and other hard objects.
Keep the knitted case clean, dry and free of grit. Never use the yarn surface as a lens cloth; remove the glasses and clean them according to the optician or lens maker's instructions. Stop using the sleeve if a seam opens, the lining bunches, the fabric becomes gritty or the frames need force to enter. Pocket Change's lack of a hard fastening avoids placing a button near the frames, but it does not turn soft knitting into impact protection.
Record the first fit
Write down the frame measurements, chosen size, washed gauges, needle size, yarn, lining choice and final case dimensions. After several careful uses, note whether the opening has relaxed, the flap still covers the top and the glasses slide in without catching. The pattern's maths is checked, while physical test-knitting, fit and yarn consumption remain unverified; your first completed case provides the practical evidence for that yarn and those frames.
For another small flat-knit project, Pocket Fox turns a glasses sleeve into a woodland character, while How to size a knitted book sleeve before sewing applies the same measure-swatch-check logic to books. The knitting collection gathers the wider range by project type and construction.
Final checks before the case goes into service
- The folded glasses were measured for length, width and thickness.
- The washed seed-stitch and garter-stitch gauges were checked separately.
- The body width and length match the chosen size or worked custom calculation.
- Both flap edges taper evenly and the stitch totals match after each decrease row.
- The side seams lie flat, with ends secured away from the interior.
- Any lining is smooth, clean and free from bulky or abrasive details.
- The glasses enter and leave without pressure on the lenses, bridge or hinges.
- A rigid case will be used whenever real impact or crushing protection is needed.
The knitting is deliberately compact: one flat piece, two textures, a tapered flap and two side seams. The thoughtful part happens before and after the needles—measuring the folded frames honestly, letting two washed swatches speak for their own fabrics and checking that the finished sleeve asks nothing strenuous of the glasses.
More to read, make and discover
A few useful, interesting and checked routes into the subject.
- Official knitting guidanceCraft Yarn Council: reading instructions and making a gauge swatch
Explains making a gauge sample with the yarn, needles and stitch pattern specified by the pattern.
- UK knitting guidanceKnitting & Crochet Guild: hand-knitting tension square
Shows how to mark and count a central area of a tension square rather than measuring unreliable edge stitches.
- Yarn guidanceCraft Yarn Council: yarn label information
Lists fibre, yarn weight, gauge and care information to retain when choosing and caring for project yarn.
- Eyewear care guidanceZEISS UK: lens cleaning and storage
Advises suitable lens-cleaning materials and a hard case when glasses are not being worn; used here to distinguish a soft knitted sleeve from impact protection.