Measure the napkin you will actually use
A cloth napkin can be folded into a slim rectangle, gathered into a soft fan or rolled into a surprisingly substantial cylinder. Its flat width says almost nothing about the space a ring needs. Fold or roll one napkin exactly as you intend to place it on the table, then keep the shape relaxed. Pulling it tight may produce a pleasing measurement and a ring that treats the napkin like luggage in an overfilled suitcase.
Measure around the roll without squeezing it
Wrap a flexible tape around the middle of the prepared napkin. Keep the tape level and let it touch the cloth without compressing the folds. Record the circumference, then repeat the measurement once. If you do not have a flexible tape, wrap a narrow paper strip around the napkin, mark where the ends meet and measure the strip against a ruler. This paper loop is also the quickest first fit test: tape it closed, slide it off and back on, and notice whether the napkin holds its shape without a struggle.
Decide what comfortable means at your table
There is no single useful diameter for every napkin and every knitted fabric. A firm linen roll may suit a ring that sits close; a thick cotton napkin or loose fan needs more room. Add a little space if guests should be able to remove the ring with one hand. Use a closer fit if the ring's main job is to hold a carefully arranged fold. Test the paper loop both ways before choosing. The best size is the one that supports the presentation and then gets out of the way politely.
Check the pattern route before changing it
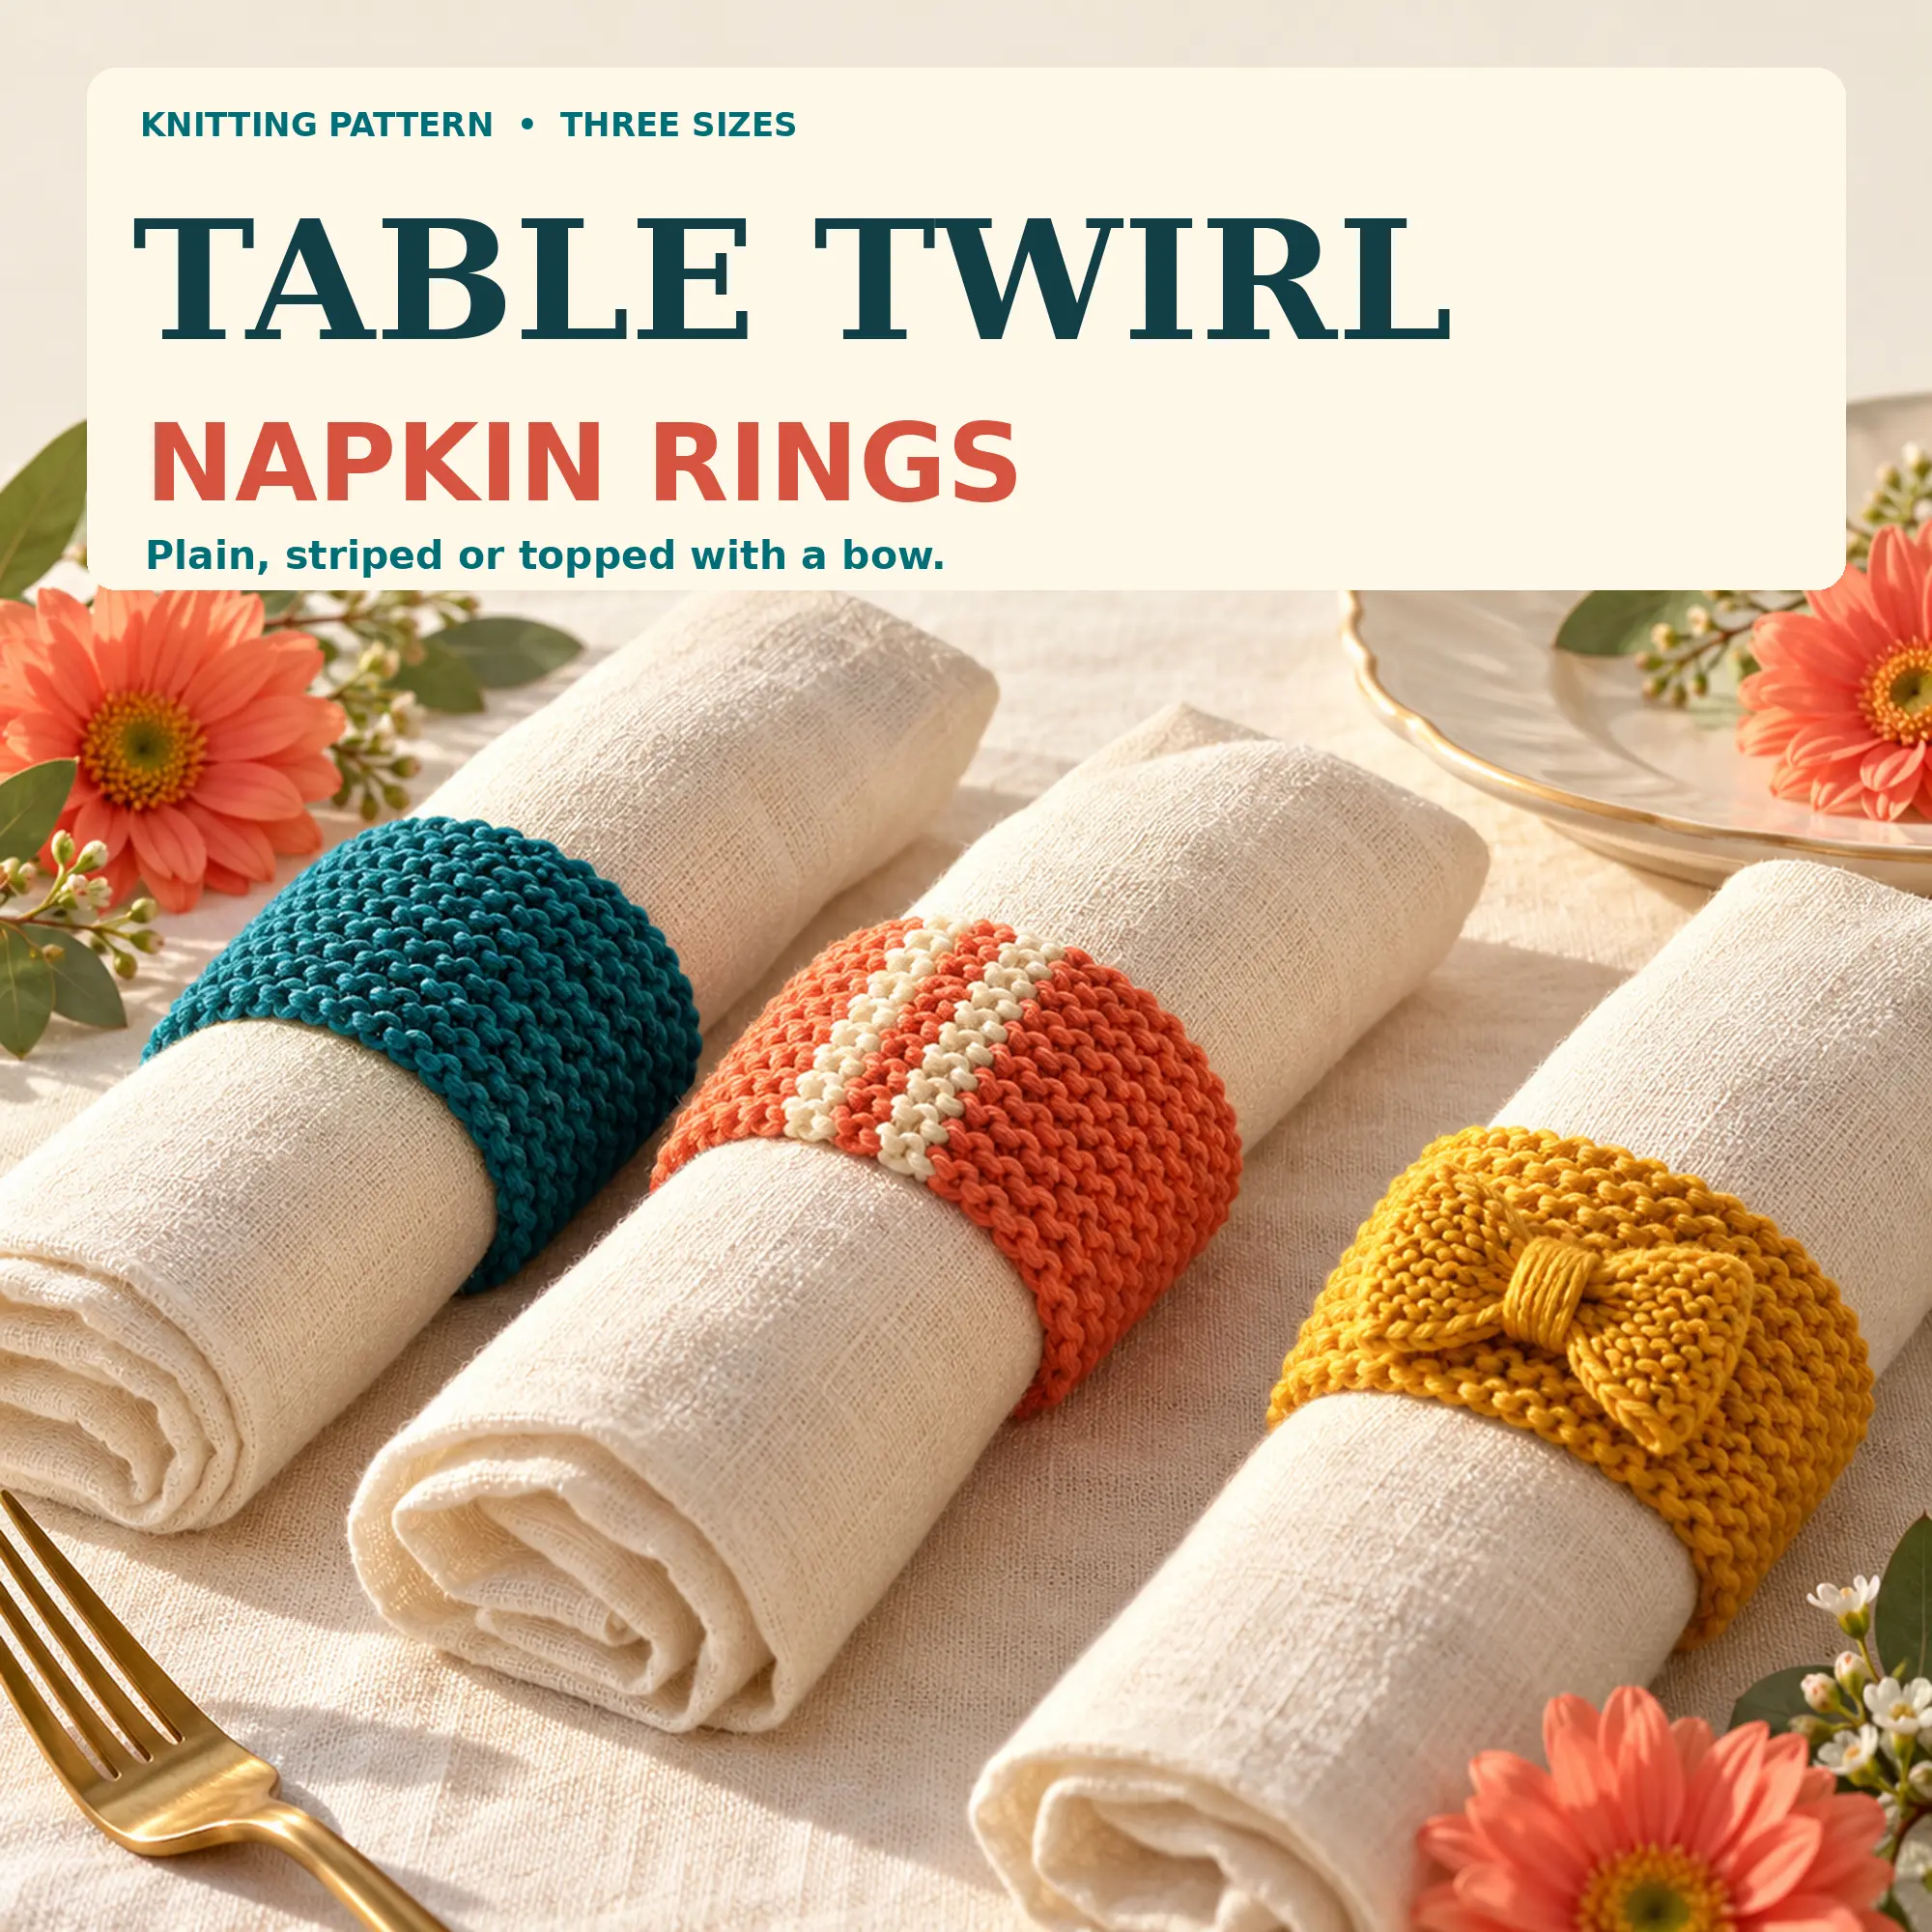
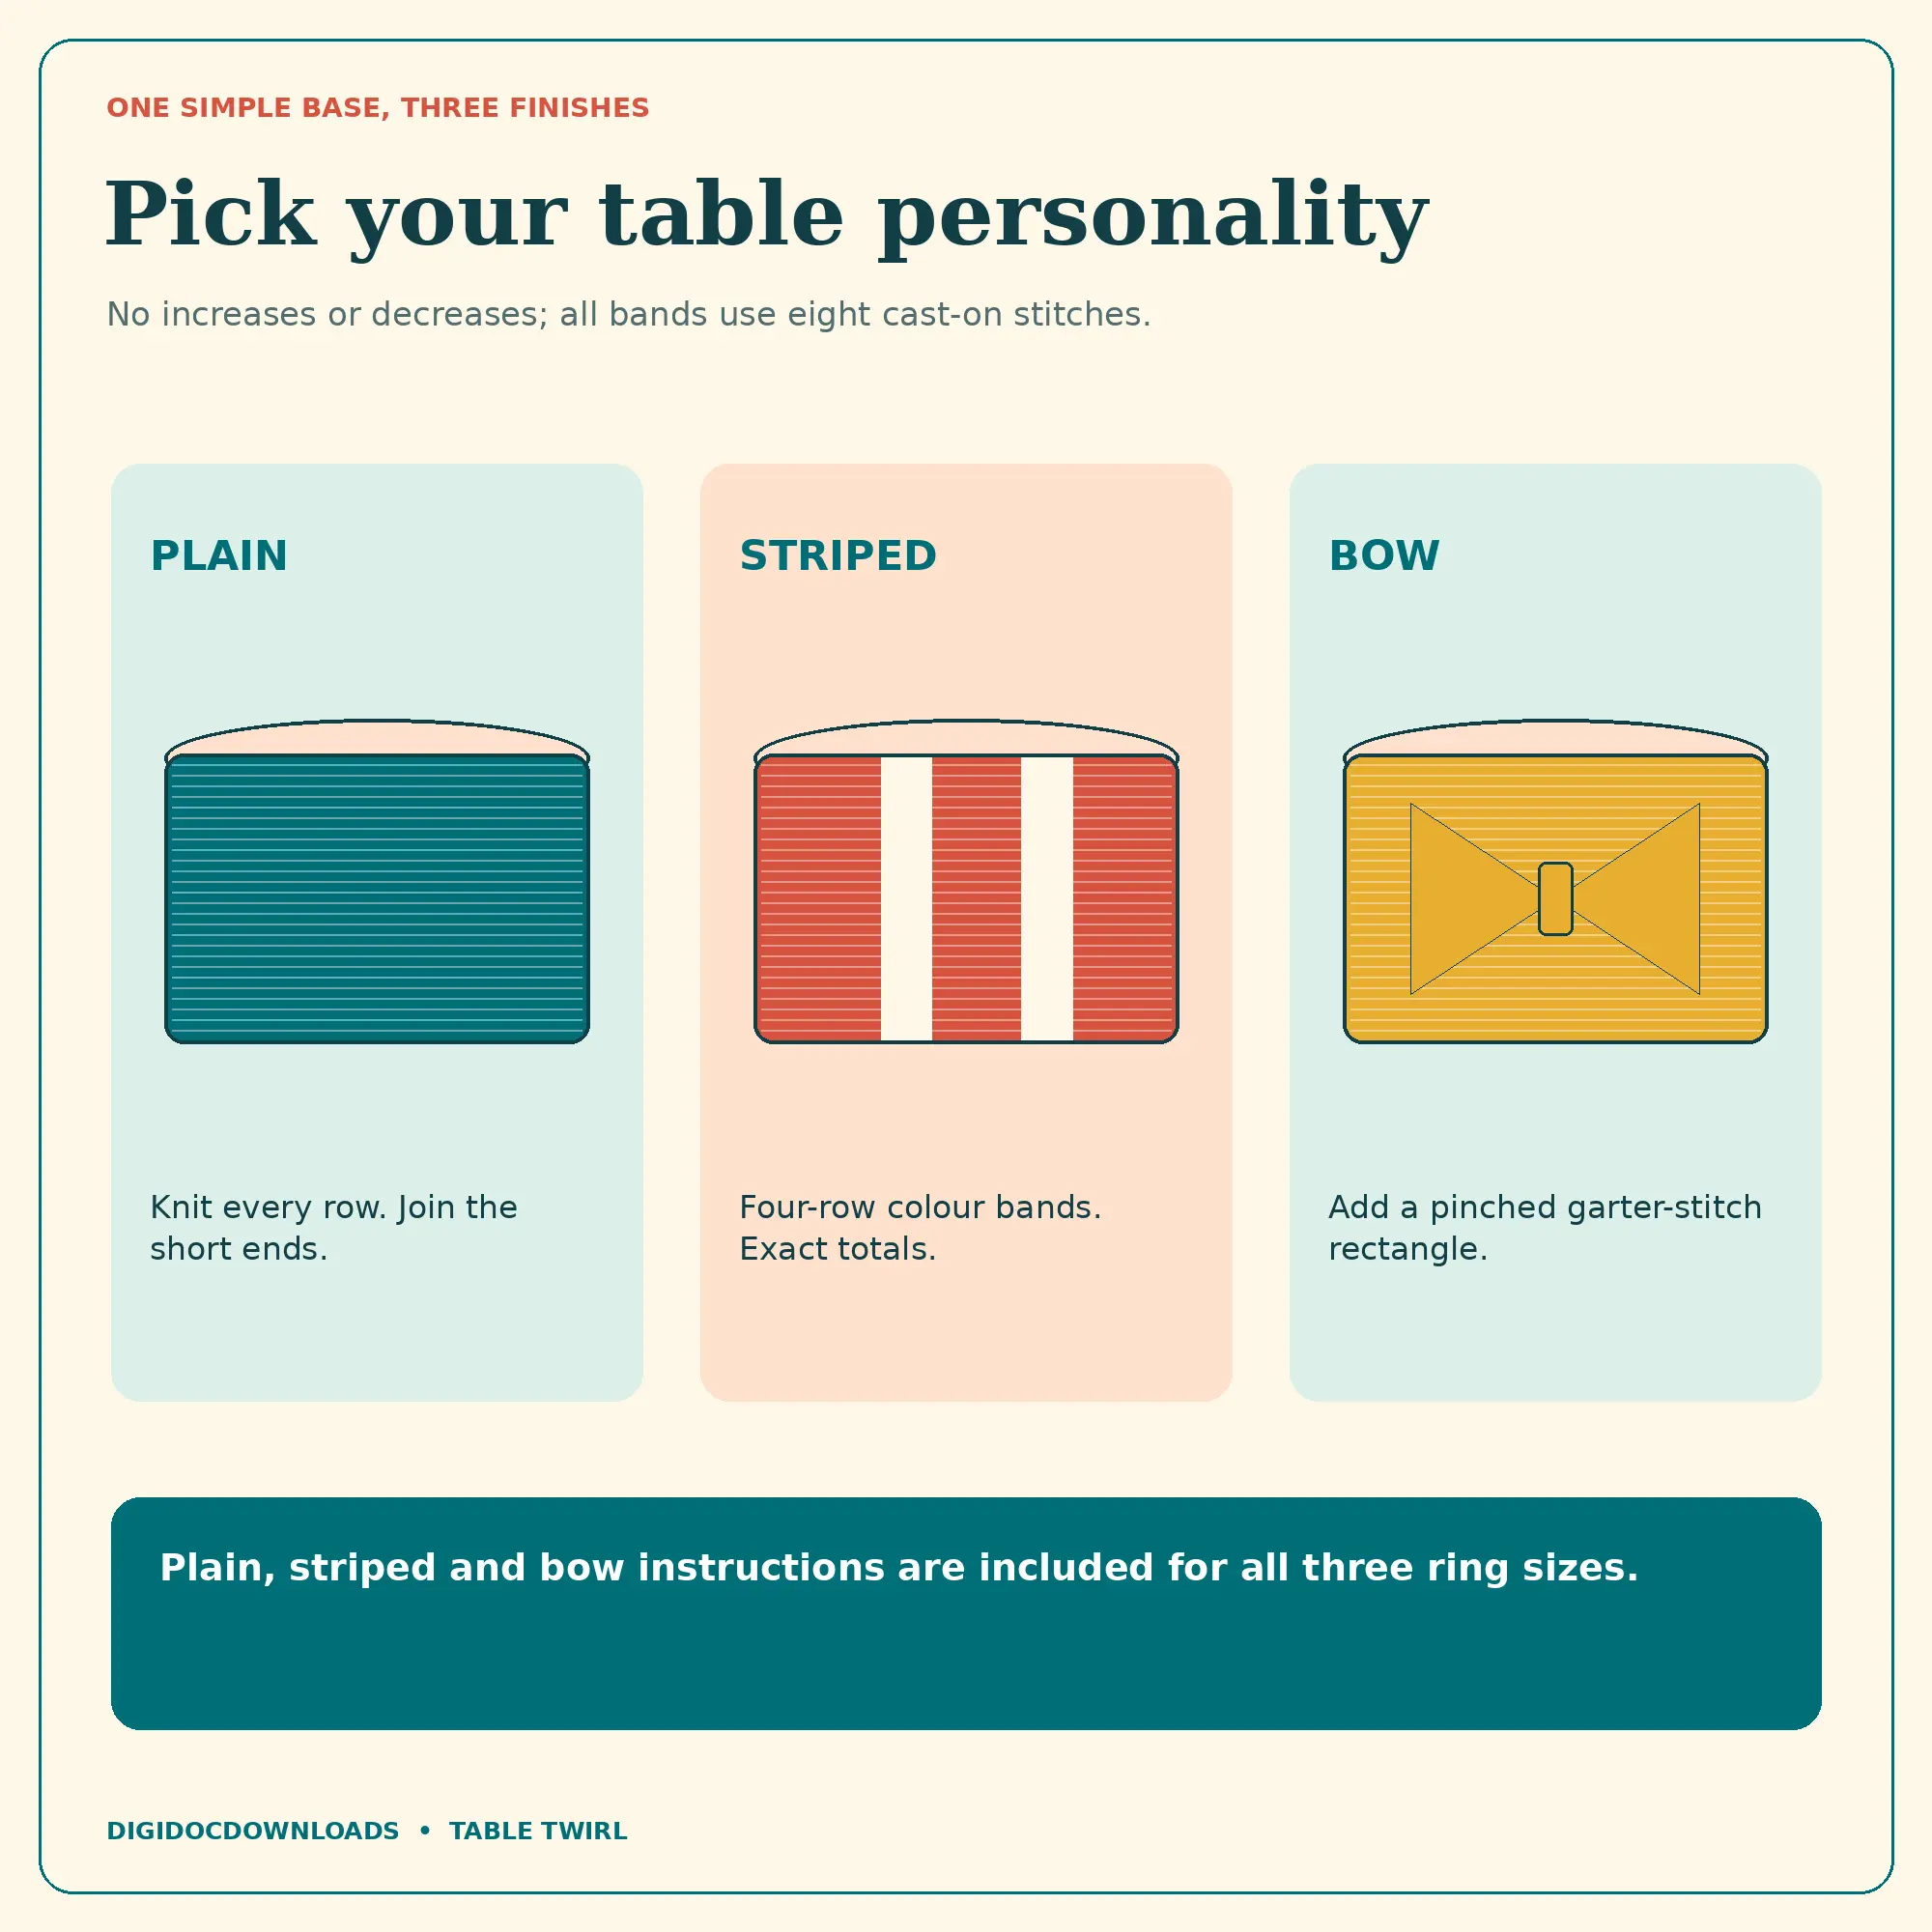
Read the complete sizing section before altering stitch or row counts. A pattern may offer finished sizes, a custom-fit route or both. Table Twirl provides three preset band lengths of approximately 14, 16 and 18 cm plus washed-gauge guidance and a worked custom-fit calculation based on the maker's own rolled cloth napkin. Its bands are knitted flat with eight stitches and no shaping, then the short ends are joined. Follow the written calculation when using that pattern; this guide helps you collect the right real-world measurements and test the result.
Treat yarn weight as a category, not a guarantee
The Craft Yarn Council's Standard Yarn Weight System places DK yarn in the Light category and publishes broad gauge ranges for comparison. Those ranges help identify the kind of yarn on a label; they do not make every DK cotton interchangeable. Fibre, twist, construction, needle choice and the knitter's own tension all affect the finished fabric. The Council's yarn standards FAQ makes the same practical point: yarns in one weight category may still require a gauge swatch before substitution.
Make the swatch behave like the finished ring
Use the named stitch pattern, yarn and starting needle size. Make a swatch larger than the tiny area you need to measure so the edge stitches do not distort the result. If the project will be striped, include a colour change; if it will be plain, do not add one merely to make the swatch more exciting. Measure the fabric in its relaxed state, wash it according to the yarn label and the pattern's guidance, let it dry fully, then measure again. The second measurement is the one that better represents a washable table item.
Use washed gauge for the calculation
Gauge describes how many stitches or rows occupy a stated distance. For a band knitted lengthwise, row gauge may control the circumference; for another construction, stitch gauge might. Follow the pattern's stated direction rather than assuming which number matters. Count over a sensible central area, calculate the average and keep the units consistent. If you measured the napkin in centimetres, keep the gauge in centimetres until the calculation is complete. Converting backwards and forwards is an excellent way to give a small ring a much larger personality.
Knit and finish one ring first
Before casting on for six, eight or twelve places, complete one plain test ring. Work it in the chosen yarn, join it using the intended seam and wash or settle it as the pattern directs. A flat strip can appear correct while still changing slightly at the seam. Try the finished ring on the prepared napkin, slide it on and off several times and leave the napkin in place for a few minutes. Check whether the ring creeps, flattens the roll or catches on textured cloth.
Test the decoration separately from the fit
Stripes usually change appearance more than size, although carried or cut yarn ends still need secure finishing. A knitted bow adds bulk and a small point of leverage when the ring is handled. Make the band fit first, then add and test the decoration. Place the finished ring on the table, turn it through several angles and check that the bow or seam rests where intended. If children will help lay the table, make sure any added piece is firmly attached and supervise according to the materials and setting.
Keep the napkin, ring and care instructions together
A table set is easier to use when nobody has to remember which yarn tolerated which wash. Retain the yarn label and record the fibre, colour, needle size, washed gauge and finished band measurement. The Craft Yarn Council's care-symbol guide explains the common symbols for washing, bleaching, drying, ironing and professional care, and recommends keeping the label with information for a handmade item. Follow the actual label on your yarn rather than assigning a general rule to all cotton.
Record the successful version before making the set
Once the test ring works, note the napkin fold, measured circumference, yarn, needle, gauge, row or stitch count, finished size and any decoration. Photographing the ring on the napkin can be more useful than photographing it alone. Then repeat from that record, checking the first few bands against the successful one. Small differences are normal in hand knitting; the aim is a set that behaves consistently at the table, not a row of objects awaiting inspection with callipers.
Measure the table setting, test one finished ring and let the successful sample become the plan.
A short fitting checklist
- Fold or roll the exact cloth napkin as it will be presented.
- Measure its relaxed circumference twice.
- Test the intended space with a taped paper loop.
- Swatch in the real stitch and measure again after washing.
- Use the pattern's stated gauge direction and custom-size method.
- Finish, wash and test one plain ring before knitting the set.
- Record the successful size, yarn, needle and care information.
If the test ring slides comfortably, keeps the napkin arranged and survives its intended care, the sizing work is done. A plain paper loop and one finished sample have answered the important questions before the rest of the place settings reach the needles.
More to read, make and discover
A few useful, interesting and checked routes into the subject.
- Knitting standardsCraft Yarn Council: Standards and Guidelines for Crochet and Knitting
The industry standards bring consistent yarn, needle, pattern and label information together so knitters can compare the materials named by a pattern.
- Yarn and gauge guidanceCraft Yarn Council: Standard Yarn Weight System
The system places DK in the Light category and gives a general stockinette gauge range; the Council also cautions that a weight category is not proof that two yarns will behave identically.
- Care guidanceCraft Yarn Council: Care Symbols
The guide explains the washing, bleaching, drying, ironing and professional-care symbols commonly found on yarn labels and recommends retaining the label for finished-item care.
- Yarn substitution guidanceCraft Yarn Council: Standards FAQs
The Council cautions that the standard yarn-weight system is not an interchangeability chart and recommends making a gauge swatch before substituting yarn.